
Share a board or selected lists publicly
Public board sharing gives clients or stakeholders a read-only view of selected work. It is available on paid plans.
Choose what to share
- Open the board you want to share.
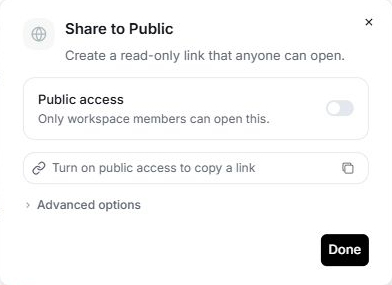
- Open its menu and choose Share to Public or the public-sharing option shown.
- Review whether you want to share the whole board.
- Use Advanced options to select individual lists when only part of the board should be visible.
- Review the selected content, then enable public access.
A link indicator in the board header helps identify shared lists. Check the actual sharing selection rather than assuming that a private working view is what recipients will see.
Share and verify the view
Copy the public link, or use the embed snippet when you want to show the shared view on another page. Open the link in a signed-out or private browser window and check the visible lists and task information.
Use a focused client-delivery list when other lists contain internal planning. Public recipients have a read-only view; public sharing should not be treated as inviting them to collaborate as workspace members.
Change or stop access
Return to the board's sharing controls to adjust the selected lists or disable public access. Retest the link afterwards. Removing public access cannot recall information someone already copied.
If sharing is unavailable
Check the workspace plan and your permissions. If a recipient sees the wrong content, review Advanced options, copy the current link and test it again.
Related: task management and public file sharing.
Read this guide in another language: Deutsch · Español · Français · Italiano · Português
Updated on: 05/10/2026
Thank you!