
Create forms and turn submissions into tasks and documents
Use Forms to collect requests, project briefs or feedback in a consistent format. Creating forms requires Business.
Build a form
- Open Forms and choose a blank form or a template.
- Select the destination space and give the form a clear name.
- Add and edit fields, using the live preview to check the order and wording.
- Explain what respondents should provide and make only essential fields required.
Choose what a submission creates
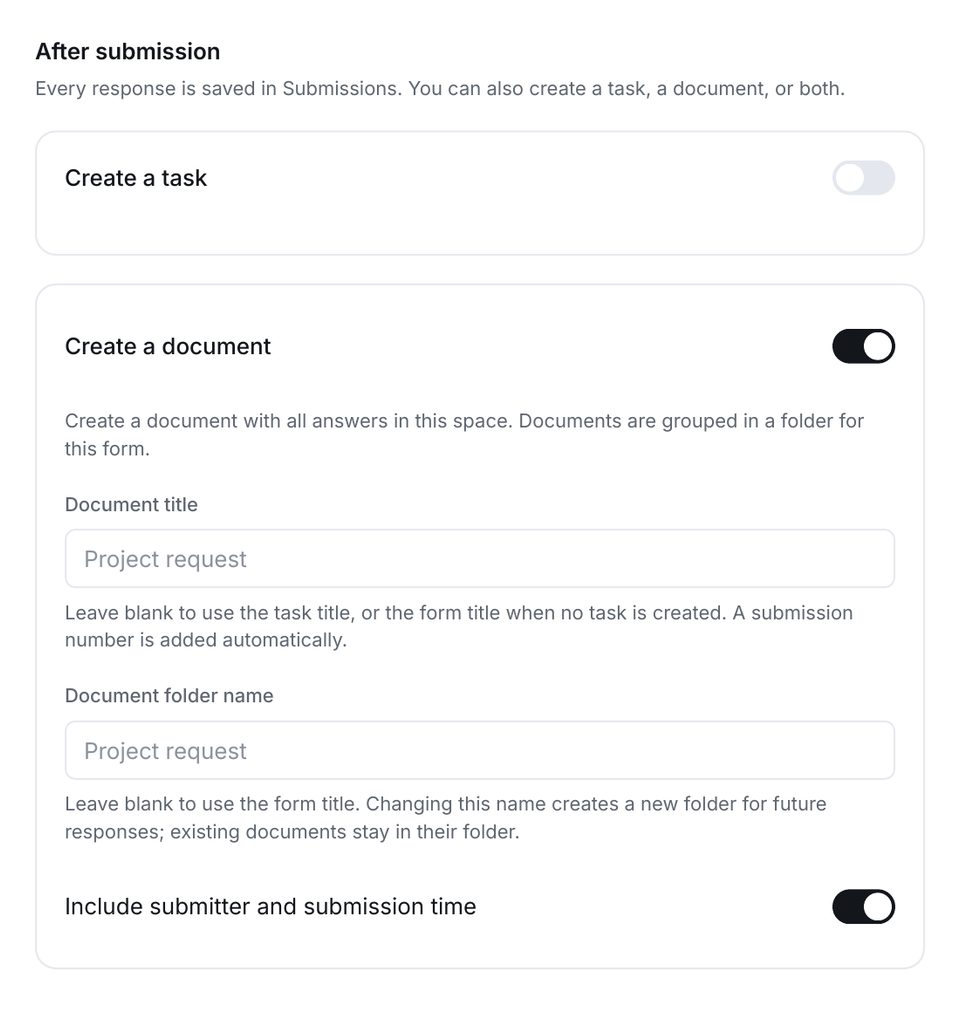
Open After submission. Responses can create a task, a document, both or neither.
- For tasks, review the destination and defaults such as list, state, priority and assignee.
- For documents, review the title, folder and whether answers or submitter information should be included.
- Responses remain available in Submissions, including when no task or document is created.
Publish and test
- Review access: workspace access limits submissions to members; public access allows submissions through the link.
- Configure password protection or an expiration date if required by your sharing setup.
- Publish and copy the shareable link.
- Submit a clearly labelled test response using the intended audience's access.
- Open Submissions and verify the response and any resulting task or document.
Check the output before distributing the form widely. A public form link should not be used to collect information your team does not need.
If the expected output is missing
Check After submission, the selected destination, required fields and workspace limits. A stored response does not necessarily mean task or document creation was enabled.
Related: tasks, Docs and roles.
Read this guide in another language: Deutsch · Español · Français · Italiano · Português
Updated on: 05/10/2026
Thank you!